If you’re trying to start live streaming on YouTube but aren’t exactly sure how to get OBS Studio set up, this walkthrough is for you. In this tutorial, I’ll show you exactly how to connect OBS to your YouTube channel, use your Logitech C920 webcam as your camera, and create a few simple, practical layouts for your stream.
By the end, you’ll have a working OBS setup that’s ready to go live on YouTube and you’ll avoid a few common mistakes that can ruin a good stream before it even starts.
Setting Up OBS Studio
Start by downloading OBS Studio from obsproject.com. Choose the version that matches your operating system. I’m on a Mac, so I installed the Mac version, but the setup process is nearly identical on Windows.
Once OBS is installed, connect your Logitech C920 webcam to your computer using a USB hub or adapter. If you’re on a MacBook Pro, you’ll definitely need one. After your webcam is connected, open OBS and let’s build your first layout.
Understanding Scenes and Sources
OBS works with two simple building blocks: scenes and sources. Think of a scene as a layout or page, and sources as the individual elements that live inside that page such as your camera, microphone, display capture, or text.
Start by creating your first scene. In the bottom left corner of OBS, you’ll see a panel labeled “Scenes.” Click the plus button and name your new scene “Camera Only.” Then go to “Sources,” click the plus again, and add your C920 as a new Video Capture Device.
Select your Logitech C920 from the device list and set the resolution to 1920x1080 for full HD.
If your image looks blown out or overexposed, that’s normal for the C920. It’s a common issue. You can fix it by turning off auto exposure and auto white balance using the Logitech G HUB app. I have a full video that walks through those hidden settings.
Setting Up Audio
Next, let’s make sure you actually have sound. Go to “Sources” again and add an Audio Input Capture. Name it something like “C920 Internal Mic.”
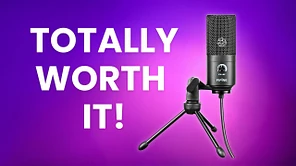
The C920’s built-in mic works, but it’s not great. It picks up everything in the room, which makes your voice sound distant. If you want a cleaner, more professional sound, use an external USB microphone like the Fifine K669B. It’s plug and play, under thirty dollars, and a big step up in audio quality.
If you’d like to hear how it compares to higher-end mics like the Shure SM57 and Blue Yeti, I did a full comparison in my previous video.
Adding a QR Code or On-Screen Text
Once your camera and audio are set up, you can start adding small visual elements to your scene like text or QR codes that make your stream interactive.
In “Sources,” add a new Image and import your QR code. Then add a Text (FreeType 2) source to create an on-screen label like “Scan to Join My Membership.” You can resize it, change the font, or add a drop shadow for better visibility.
These small touches help your live stream feel more polished and give your audience a way to engage beyond the chat.
Creating Multiple Layouts
Once your camera-only scene is done, you can duplicate it to create new layouts quickly.
For tutorials or presentations, make a “Camera + Screen” layout by duplicating your scene, removing the QR code and text, and adding a new Display Capture source. You can choose whether to show your cursor or not depending on your style.
Then crop, resize, and reposition your camera window so it sits neatly in a corner. It’s a simple change that gives your stream a more professional look.
Finally, duplicate that scene again and remove the webcam source entirely to create a “Screen Only” layout. Just remember to keep your microphone source active, or your stream will be silent.
Checking Your Settings Before You Go Live
Before streaming, double-check your output and video settings in OBS. I recommend a video bitrate of around 4500 kbps, a hardware encoder (you can use Apple H264 if you’re on Mac), and both base and output resolutions set to 1920x1080.
Make sure your audio levels are in range, not peaking but not too quiet either. Once that’s done, you’re ready to connect OBS to YouTube.
When you go live for the first time, OBS will prompt you to authenticate with your YouTube account. This is a one-time step that lets OBS broadcast directly to your channel. From there, you can start streaming right from OBS without having to open YouTube Studio.
The 3 Biggest Mistakes to Avoid
-
Forgetting to add a microphone.
If you don’t manually add your audio source, your live stream will be completely silent. Always check your audio mixer for activity before you go live. -
Leaving auto exposure on.
The C920 is known for washed-out, overexposed video. The fix is simple: turn off auto exposure and auto white balance using Logitech G HUB. I walk through those exact steps in my video “The Hidden Settings That Will Fix Your Webcam Quality.” -
Not testing before going live.
Always do a quick private stream on YouTube to test your setup. You can check your sync, audio levels, and lighting before broadcasting publicly. It takes five minutes and can save you from losing an entire session.
Final Thoughts
OBS Studio can look intimidating at first, but once you understand scenes, sources, and how to link everything to YouTube, it becomes second nature. Pair it with a solid webcam like the Logitech C920 and a clean-sounding USB mic like the Fifine K669B, and you’ll have a setup that looks and sounds far better than most default streaming setups.


